

Shift4 Gift Cards Custom Gift Card Designer User Guide
Description: The custom gift card designer user guide is a comprehensive resource for anyone looking to create personal and special gifts for their friends, family, or colleagues. Whether you're a seasoned designer or new to the process, this guide will help you make the most of the gift card designer tool and create gifts that truly reflect the recipient's personality and style.
Availability: United States, Australia, Canada, Ireland, United Kingdom
Custom Gift Card Designer
This feature is found in the Shift4 Gift Cards section of the Shift4 Dine Customer Hub for the Shift4 Dine POS admin users. Access this workflow from Choose Card Designs in the "eGift Cards" or the "Physical gift card" sections.

Select Choose Card Designs to open the Design Options. Design Your Own Card opens the custom gift card designer. 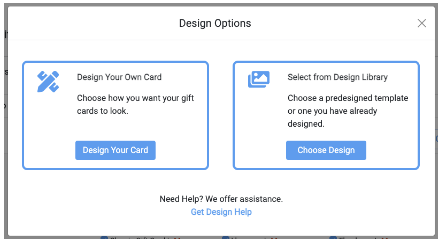
Image Specifications
For image specifications, visit the Shift4 Gift Cards Design Services and Pricing article.
Custom Gift Card Designer User

Custom design name
The name granted by the creator for the design.

Layout
There are 3 cut lines displayed over the gift card design area:
- Bleed area: The extra space around the edges of a design that extends past the print area (trim line) to allow for shifting while printing.
- Print area: The true size of the card face; text in this area is not guaranteed to print and is not recommended to be in this area.
- Text safe area: Any image or text within this area is guaranteed to print on the card face.

Backgrounds
Preloaded gift card templates: These are standard templates that may be used in addition to text or another image file.
Background Color
Important: The default grey color shown in the gift card designer will print on your gift card if you do not select a template background, insert an image file that fills the entire card, or select a different background color.
- Select the X in the top-right corner of the background window if it is open.
- Select anywhere on the grey background to display the background options.
- Select the paint bucket.
- Select a color from the top section, or enter the HEX code for the color you want. For example:
- White: #FFFFFF
- Black: #000000

Text
The language for the gift card can be personalized to ensure your message is conveyed stylishly. This section offers various customization options to make your message stand out.
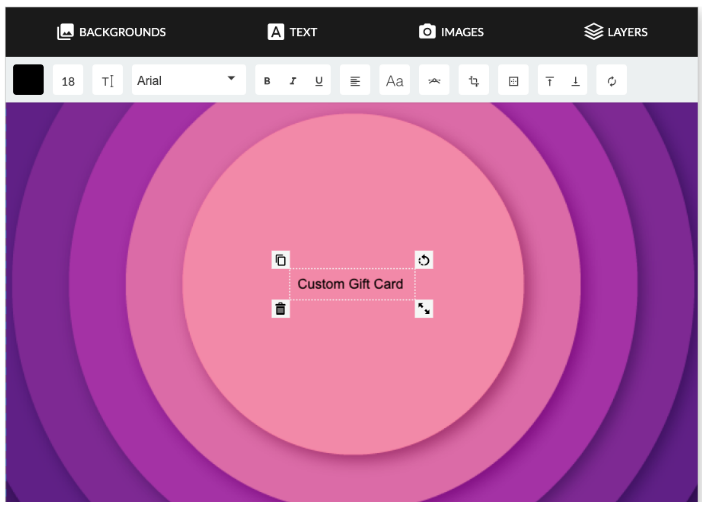
Left to Right Top text bar
- Color
- Font Size
- Edit Text
- Font
- Block, Italic, Underline
- Text Alignment
- Curved Text
- Transform
- Position
- Move Up
- Move Down
- Reset
Text
Customization of the text
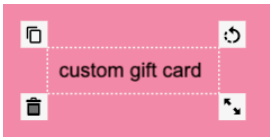
- Top left: Copy
- Top right: Move
- Bottom Left: Discard
- Bottom Right: Enlarge
Images
Click or drop images into the tool.

Layers
Allow the user to work on different sections of the gift card design without changing others.

Now that your design is complete, the tool shows a preview with the next steps.
eGift

Physical

If you are looking to upload a design only without placing an order, you will need to continue through the prompts until you reach the order screen. Then you will select the Cancel button.
