Set up and Configure the ChefTab Kitchen Video System Expediter
Description: This article describes how to set up and configure the Expediter. This is necessary in order to use the Chef Tab with a multi-station Kitchen Video System (KVS).
Settings On the Prep Stations
Device Profile Settings
- Update Station Name to what this specific prep station will be called (Grill, Fryer, Pizza, etc.)
- If using a BumpBar, make sure BumpBar Attached is checked

Ticket Pipeline Settings

Click on Expediter IP Address and enter the IP of the Expediter KVS.

Bump Settings
- Enable Item Bumping
- Make sure this is checked to enable one item to be bumped off of a ticket
- If set up correctly, the expediter will update in real-time
- Enable Two-Touch Bumping
- This is something you can decide if you want or not
- If turned on, this will require to bump twice to be fully bumped
Repeat this process for each Prep Station.

Settings on the Expediter KVS
Device Profile Settings
- Update Station Name to what this specific prep station will be called (Grill, Fryer, Pizza, etc.)
- If using a BumpBar, make sure BumpBar Attached is checked

Click on Station Type and select the Expediter Station Type.

Ticket Settings
- Make sure Merge tickets is checked off
- This will merge tickets together with the same order numbers and update the existing ticket.
- If this is not selected on the Expediter, a new ticket will be created every time an individual item is bumped on a prep station.

Expediter Settings
- Move Prepped tickets forward
- This is something you can decide if you want or not
- This will move tickets that have items prepped toward the front of the queue so the Expediter can complete that ticket
Ticket Genie
On the Expediter, go to Settings Menu > Unlock > Launch Ticket Genie.

If it is the first time, you will Capture New Ticket. The Ticket Genie will wait for a ticket to come through from the POS.

Create a ticket on the POS with menu items and modifiers, then commit. Check the KVS and the Ticket Genie formatting should have opened up with the ticket you sent from the POS.

When you are in the Ticket Genie for the first time, you will need to format your tickets. When first formatting, click on the red question mark to choose a format.
- Format lines that have to do with the ticket details (server name, order type, time, etc) as Headers
- Menu Items will need to be formatted as Items
- Modifiers will be formatted as Modifiers
Once your settings are created in the Ticket Genie, you can click Modify Existing Ticket.

At the bottom of the ticket, you will see the same details from the top. These can be formatted as Footers.
Define Fields
- Uncheck any line items that may not be necessary to show up on the Expediter.
- This is optional and up to you what you need or don’t.
- This will not affect the setup in any way.

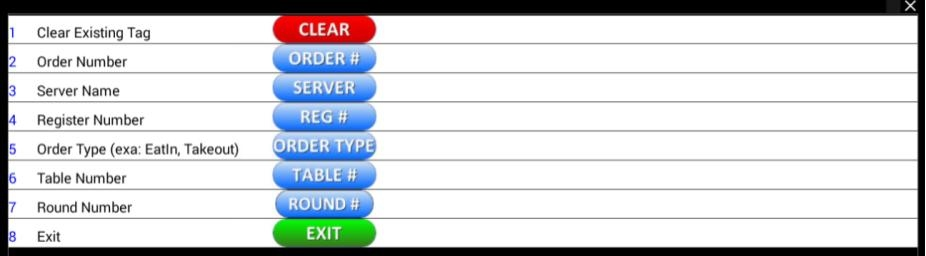
Define Tags
This is important, especially when using an Expediter. If not set up correctly, the Expediter will get multiple duplicates of tickets when individual items are bumped from the prep stations.
- It is important to label the Table Number as “Order #,” not table number
- The KVS will use the Order # to merge duplicate tickets, therefore making the Expediter update in real-time with no duplicates
- All other tags can be defined as normal, ex. Server as server, Order Type as order type