
Configure CBORD in Connect for Appetize
Description: Follow these steps to configure CBORD in Connect.
Create CBORD Integration
- Log in to Connect.
- Select Settings from the left side menu on the bottom of the screen.
- Select Integrations.
- Select the CBORD tab.
- Then select the blue Create button.
_(1).png?revision=1)
- Customize the following fields based on the site configuration.
- Provider: This must match the certificate exactly. Typically, it would just be Appetize (This is case sensitive, so must be exact)
- Location: This will be the location for the vendor or venue (ie. 01, 12000 etc)
- Code Map Pop-up Text: This will appear when a cashier/guest swipes their card before they pick which coding to use. Ex: Swipe your meal card
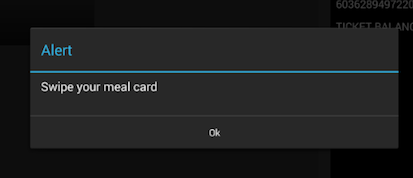.png?revision=1)
- Payment Tender Name: Customize the Tender Button name (Campus Card, Dining Card, etc).
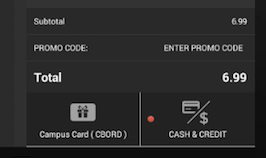.png?revision=1)
- Status: Determine if the integration is currently active.
- ON: Active
- OFF: Inactive
- Endpoint: This will be the endpoint and the port, and must match exactly.
- Format: ssl://IP:Port
- Example: ssl://111.111.11.111:2605
- System Type: Odyssey or CS Gold
Account Type: Determine which payment methods will be accepted.
- CP: Card Present
- CNP: Card not present.
BOTH: Accepts both Card Present and Card Not Present payments.
- Order Type: Set to POS.
- Vendor Role: If this is on a venue level, select Disabled. Otherwise, select which vendor role this code mapping will be assigned to.
.png?revision=1)
- Select Save to add the Integration.

- Select Save to add the Integration.
Configure Code Maps
Once the Integration is added, the specific Code Map settings can be configured.
-
- Select Click here to Add Code Maps to the Configuration.
.png?revision=1)

- Add each code map to the configuration by adding the Name of the Code Map (visible on the button) the code map number, and select if it has meal equivalency or is tax exempt.

- Select Save.
- Select the Pencil Icon to edit a specific field.
- Select the Return/Enter key on the keyboard to save each edit.
- Or select the Pencil Icon in the upper right corner to edit all fields at once.
- Select the green Checkmark icon to save the mass edits.

- Select the green Checkmark icon to save the mass edits.
- Repeat steps for as many Code maps as needed
- Once complete, select Back to return to the main Integration page.
- Select the Pencil Icon to edit a specific field.
- Select the Return/Enter key on the keyboard to save each edit.
- Or select the Pencil Icon in the upper right corner to edit all fields at once.
- Select the green Checkmark icon to save the mass edits.

- Select the green Checkmark icon to save the mass edits.
- Select Click here to Add Code Maps to the Configuration.