
Create a Prep Option in POSitouch QuickMenu
Description: Learn how to create and use a prep option screen.
This type of screen allows main item options—normally located on their own screen—to be linked and applied to other main items that are not part of the original option group. E.g., you can add the item “Add Bacon” to an item on your menu, “Tuna Melt,” and it would appear as an option that was set up specifically for that main item, Tuna Melt.
Configure a Prep Option Screen in Back Office
- Select QuickMenu from the RDC Navigator main menu.

- Create a new prep option screen.
- Select New.
- Enter screen name.
- Set the Prep Options Screen choice to Yes.
- Select Close.
.jpeg?revision=1)
- Alternatively, to change an existing screen into a Prep Options Screen, right-click on the screen name and Select Screen Properties.
.jpeg?revision=1)
- Set Prep Options Screen choice to Yes.
- Select Close.
.jpeg?revision=1)
- Create modifiers as main items and add them to the Prep Options Screen.
.jpeg?revision=1)
- Select X to close QuickMenu.
.jpeg?revision=1)
- From the Back Office main menu, select Immediate System Change.
.jpeg?revision=1)
- Select Continue.
.jpeg?revision=1)
Apply the Prep Options Screen from the Front-of-House Terminal
- Open a table and order an item.
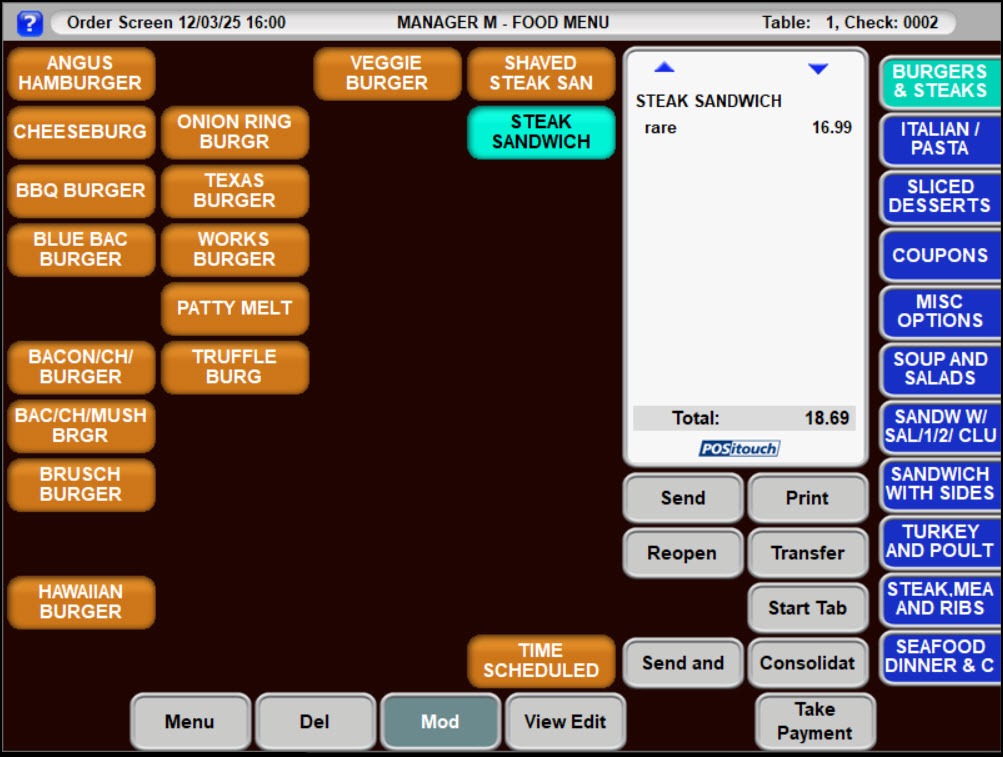.jpeg?revision=1)
- Navigate to MISC OPTIONS screen and order any additional options.
Note: Items selected from a Prep Options screen function as modifiers to the main item, even if they were not originally attached to that item’s setup..jpeg?revision=1)
Common Issues and Troubleshooting
When ordering items on my dessert screen, they are going to the kitchen as modifiers.
- From QuickMenu, right-click on the dessert screen and select Screen Properties.
.jpeg?revision=1)
- Set the Prep Options Screen choice to No. Select Close.
.jpeg?revision=1)
- Select X to close QuickMenu.
.jpeg?revision=1)
- From the Back Office main menu, select Immediate System Change.
.jpeg?revision=1)
- Select Continue.
.jpeg?revision=1)
I use MenuW and not QuickMenu. Can I use this prep option screen feature?
- From the back office main menu, select Menu Editor.
- Select Prep Printouts.
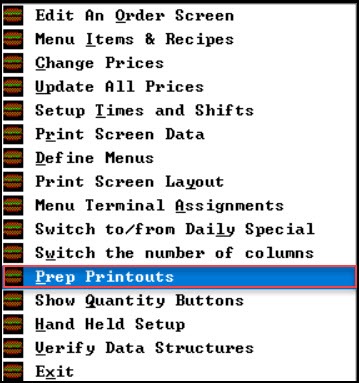.jpeg?revision=1)
-
Select Prep Sequence Screens.
.jpeg?revision=1)
Screens marked as Y (Yes - normal case screens) containing items are sent to their prep stations as usual. Screens marked as N will be treated as modifiers and will follow the main items ordered before them.
- Type in the screen number to change a normal case screen marked as Y to an N to set it as a prep options screen. Select Save.
.jpeg?revision=1)