
Description: Workers are the profiles that are used by Dynamics 365 to identify the employees using the Call Center and Retail environments for order processing and POS operations. Learn how to create a worker below.
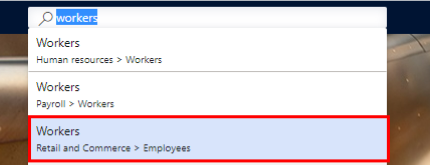
- Navigate to Retail and Commerce > Employees > Worker.
- Select New to create an employee.

- Fill in all of the employee information, and once done, select Hire and add details, which will bring you to the details page of the employee information.
.png?revision=1)
Note: If you select "Hire" it will create the employee, but you’ll have to search for it in the Workers list to get to the Employee Details page. - Navigate to the Commerce tab on the header, then select Associate existing identity.
.png?revision=1)
- Search for the Email address associated with the User that this worker profile is being created for. Once found, select OK.

Note: These external identities refer to users created from the Azure Active Directory (AD), where permissions to the subscriptions that promote the D365 topology are set. If the identity does not appear on the list it is likely due to the fact that one has not yet been created. For more information, visit Microsoft documentation, which expands on this topic further. - Navigate to the Profile tab.

- Select the Address books dropdown under the Profile tab, and select the location this user is associated with. If selecting all locations, select the
next to “Name” to select all.

- Navigate to the Commerce tab in the body of the page.

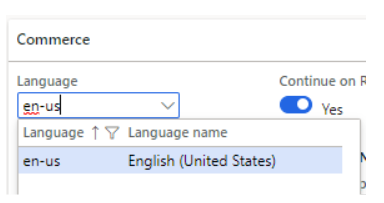
- Enter your Language.
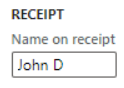
- Choose how you want your name to be displayed on receipts.
- Enter the employee password (PIN) for POS Authentication.

- Select the preferred default Screen layout ID for that worker. This ID will determine the default screen layout that the employee will see when they log into the POS.

- Up next, we will need to assign a position to the Worker you’ve created. To do so, navigate to Retail and Commerce > Employees > All positions.

- Select Create new position and fill in the desired job description for that role.

- Expand the Worker assignment panel and select New.

- Enter the Worker name this position is being assigned to.

- Once this is complete, navigate back to Retail and Commerce > Employees > Workers to complete the Worker setup.

- Navigate to the Commerce tab on the header navigation bar and select POS permissions.
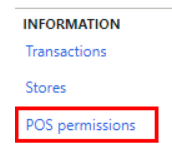
- Switch Override permissions to Yes and make sure the POS permissions group is set to the desired role.

- Once finished, select Save.

- Once done, select Save and run a Distribution Schedule task to push the parameter changes to the POS Software module. This is the final step before we get to configuring the POS application. This step must be completed in order for the POS to work.