

Description: Learn how to schedule a report in Business Intelligence.
Availability: United States, Canada, Ireland, Spain, United Kingdom
Schedule a Report
You can create a schedule for any report in Business Intelligence to have it automatically emailed at set intervals.
For example, you can schedule your Employee Wage Report to be sent to your payroll service or accountant at the end of each pay period.
To schedule a report:
- Open the report (for example, Employee Wage Report).
- Select the 3 dots (ellipsis) in the top-right corner.
- Select Schedule Report.
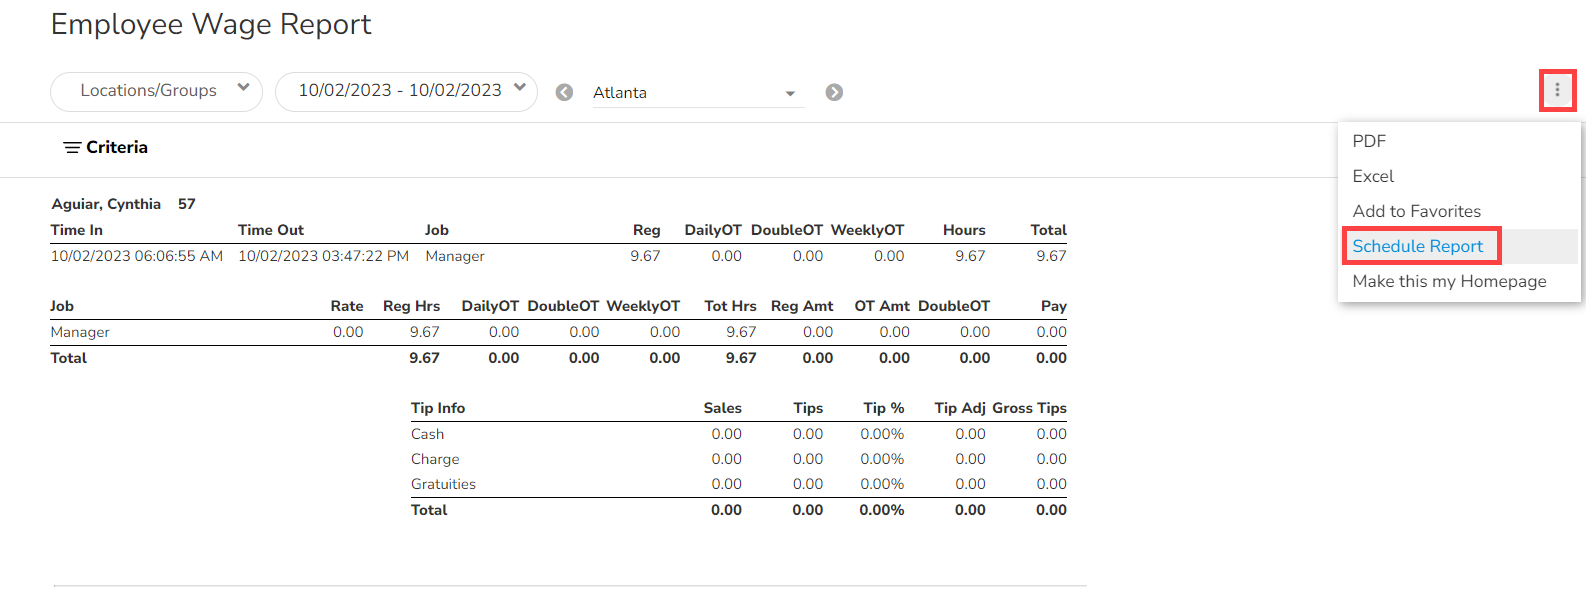
A new window will open where you can configure the schedule.
Schedule Settings

Scheduled report name
Enter a name for the scheduled report.
This name will appear in the subject line of the email when the report is sent.
Report Date Range
Use the dropdown to select the date range for the report.
Payroll Example: Select Last Pay Period to send the report for the most recently completed pay period.
Note: When you choose Last Pay Period, the report will automatically send each pay period to the recipients you specify.
Start sending report on
Select the date the schedule becomes active:
- To activate immediately, enter a previous date (for example, yesterday).
- To activate in the future, select a future date.
Send Every
Choose how often the report should be sent (Daily, Weekly, Every Pay Period, etc.).
Payroll Example: Select Every Pay Period so the report is sent after each completed pay period.
Send On
If applicable, select the day the report should be sent.
For recurring ranges (such as weekly or every pay period), enter the day number after the period ends.
Example: If you want to allow managers two days to review payroll, set this to 3 so the report is sent on the third day after the pay period ends.
Repeat Every
Specify how often the report should repeat based on your Send Every selection.
Send At
Enter the time of day and select the correct time zone for sending the report.
Disabled
Select this option to temporarily stop the report from being sent without deleting the schedule.
Add Recipients
- Select Add Recipient Emails.
- In the new window, enter the email addresses.
- Send To: Add the primary recipient email address.
- Send As: Choose CC to copy additional recipients or BCC to keep the recipient email addresses private.

Payroll Scheduling Best Practice
When scheduling Payroll reports:
- Set Report Date Range to Last Pay Period
- Set Send Every to Every Pay Period
When these options are selected, the report will automatically be emailed to all recipients each pay period.
View, Update, or Delete Scheduled Reports
View Scheduled Reports
- Go to My Settings > Scheduled Reports.

- Select the report name to open the schedule settings.

Update a Scheduled Report
- Make your changes.
- Select Update to save.

Delete a Scheduled Report
- Select Delete.
- A confirmation window will appear.
- Select Yes to delete the schedule, or Cancel to keep it.