
Windows 11
- Open the Start menu and navigate to Settings.

- From the Settings menu, select System.
- Select Power & battery.

- Select Screen, sleep, & hibernate timeouts.
- Set the Sleep dropdown to "Never."

Windows 10
- Open the Start menu and navigate to Settings.
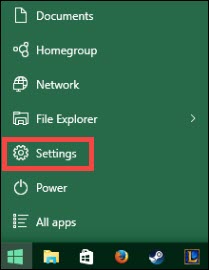
- From the Settings menu, select System.

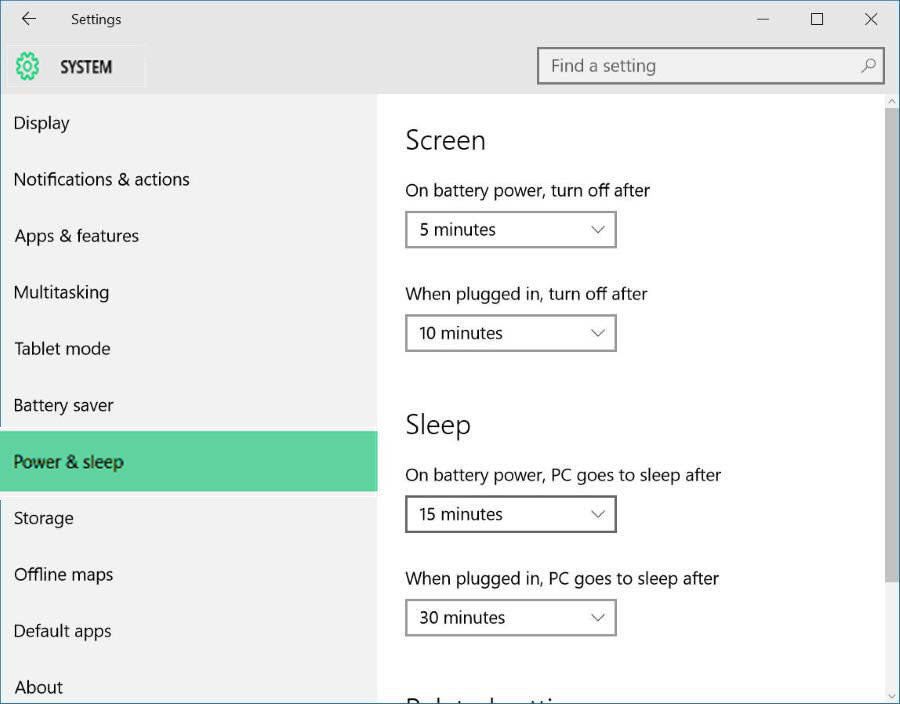
3. Select Power and Sleep, then set the Sleep dropdown to "Never."
Older versions of Windows
- Open the Start menu and navigate to the Control Panel.
- Change the Category Viewing options to "Small Icons" if not already using this setting.
- This is located at the top-right of the screen and gives access to all menu items.
- Find and open the Power Options on this list (it should be alphabetical). This screen shows you one of three things selected:
- Power Saver
- Balanced (typically the default)
- High Performance
- On the highlighted selection, select the option of Change Plan Settings.

- Set the Put the computer to sleep dropdown to "Never," then select Save Changes. This will ensure the computer will no longer go to sleep when inactive.
